There are a number of technologies that are becoming more and more important in the SAP world. Next to SAP's new flagship HANA we are talking about OData and SAP UI5. Therefore it is no surprise that SAP enabled their SQL Anywhere database to speak OData as well.
This blog will show how to enable the SQL Anywhere database to become an OData provider and how to consume this service from a locally installed WebIDE.
First you will need to install SQL Anywhere and the local Web IDE. Here are the download links:
- SQL Anywhere 17 Developer Edition - https://go.sap.com/cmp/syb/crm-xu15-int-sqldevft/index.html
- Local Web IDE - https://store.sap.com/sap/cpa/ui/resources/store/html/SolutionDetails.html?pid=0000013489&catID=&pcntry=DE&sap-language=EN&_cp_id=id-1460144753813-0
The installation of SQL Anywhere 17 is straightforward. For the Web IDE it is a bit more complex. Please refer to the installation guide that is provided on the trial download page. Please note that the local Web IDE is just a trial and not ment for productive use.
After installation, we first need to create a database. We can do this three different ways:
- Using the Wizard in SQL Central
- Via an SQL Statement
- Via the dbinit command line tool
I will spare you the screenshots of the SQL Central Wizard - to start it, open SQL Central, go to SQL Anywhere 17 - Tools - Create database.
Here is the SQL statement and the command line:
SQL
CREATE DATABASE 'C:\blog\equidb.db' LOG ON 'equidb.log' CASE RESPECT COLLATION 'UTF8BIN' NCHAR COLLATION 'UTF8BIN' DBA USER 'dba' DBA PASSWORD 'sql' MINIMUM PASSWORD LENGTH 3;
Command line
dbinit -c -z "UTF8BIN" -zn "UTF8BIN" -dba "dba","sql" -mpl 3 -t "equidb.log" "C:\blog\equidb.db"
Once the database is created, you can start it with this command:
dbsrv17 "C:\blog\equidb.db"
Now connect to it via SQL Central (SQL Anywhere - Connect to database).
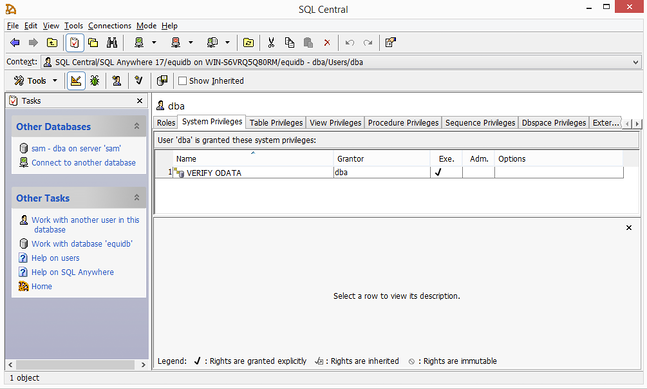
The next thing we need to do is to give the user, who will access the OData service, the right privileges. To do that:
- Go in SQL Central to Users
- Select the user dba
- Go to tab System Privieges
- Right click and select new - Granted System Privileges
- Scroll all the way down and select "VERIFY ODATA"
- Select Ok
- Save
Create database tables
In this example we will have just one table. You can create it via Interactive SQL (ISQL), a tool that is part of the SQL Anywhere installation. Open it, connect to the running equidb and execute the following:
CREATE TABLE IF NOT EXISTS equipments ( id int not null, name nvarchar(40) not null, serialno nvarchar(20), manufacturer nvarchar(40), constructionyear int, constructionmonth int, primary key (id));commit;
After creating the table, we will insert some data:
INSERT INTO equipments VALUES (1, 'Crane 1-XO-1310', '1310-0412-2210-1708', 'msc Construction Inc.', 2003, 10);INSERT INTO equipments VALUES (2, 'Crane Arm BB-7', '082-190-783-140', 'msc Construction Inc.', 2003, 10);INSERT INTO equipments VALUES (3, 'Crane Sensor Unit', '141-003-871-953', 'Sapere Aude GmbH', 2003, 10);INSERT INTO equipments VALUES (4, 'Chain 4m', 'CS-171-121-5122', 'Carl Stahl GmbH', 2014, 01);INSERT INTO equipments VALUES (5, 'Chain 2m', 'CS-171-121-1881', 'Carl Stahl GmbH', 2014, 06);
Creating the OData Producer
To enable OData, we need to create a OData Producer. This can be done again via a wizard in SQL Central or via the following SQL statement:
CREATE ODATA PRODUCER "equi" ADMIN USER "dba" AUTHENTICATION USER "dba" MODEL VALUE 'service namespace "Equi" { entity "dba"."equipments";}' ROOT '/equidb/equi';COMMENT ON ODATA PRODUCER "equi" IS 'Odata producer for equipments';
Enable OData on a database level
To enable OData, we need to start the database with the option -xs. The complete statement looks like this:
dbsrv17 -xs "odata(ServerPort=8080;LogFile=sam_odata.txt;LogVerbosity=2)" C:\blog\equidb.db
After the -xs option we specify the port, the logfile and the log level.
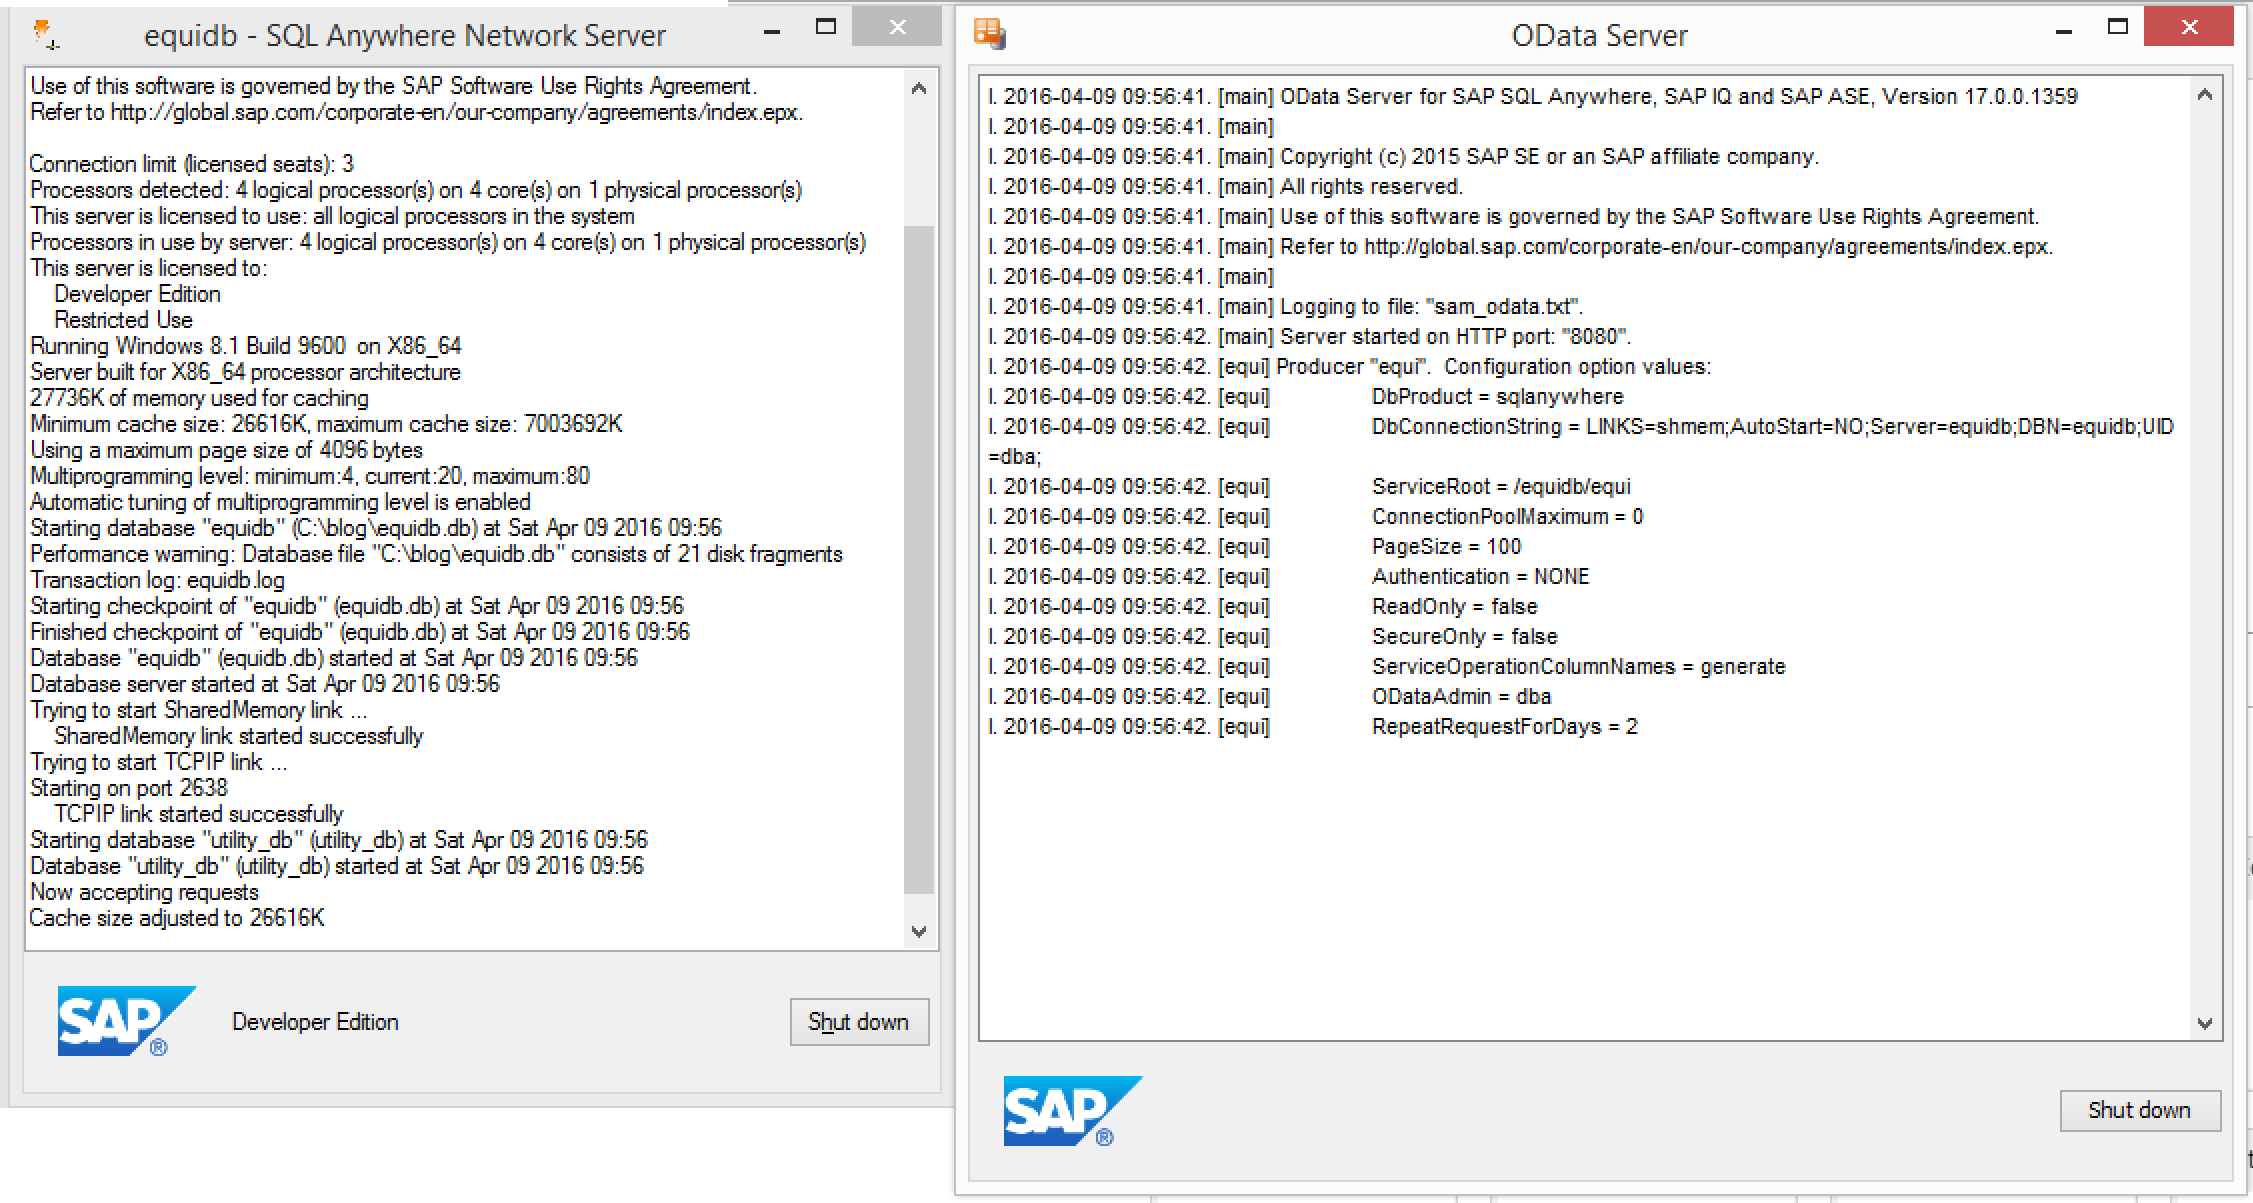
Now we not only have the SQL Anywhere database, but also the OData server window.
To access the OData service, enter the following URL into the browser:
http://localhost:8080/equidb/equi/equipments
You will see the following output in your browser:

Accessing the OData service from the Web IDE
To access the service, you need to create a new destination. Please refer to the local Web IDE documentation for this. I called mine EQUI and the destination file has the following content:
Description=EQUIType=HTTPTrustAll=trueAuthentication=NoAuthenticationName=EQUIProxyType=InternetURL=http\://192.168.71.153\:8080/equidb/equi/WebIDEUsage=odata_genWebIDESystem=EQUIWebIDEEnabled=true
Start the local Orion server and with it the Web IDE and login.
Now follow the steps shown in the screenshots below (select the screenshots to enlarge them):
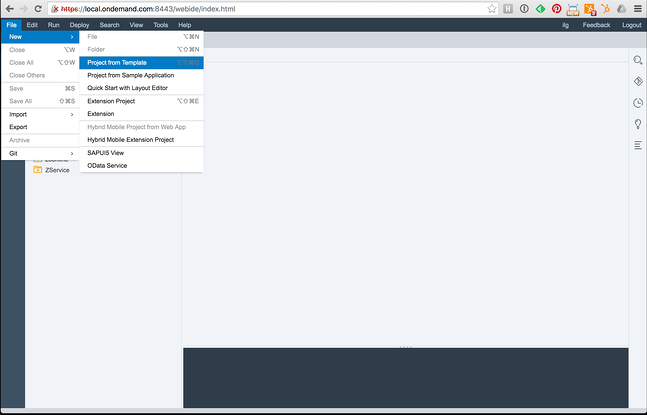
1. Create a new project from a template
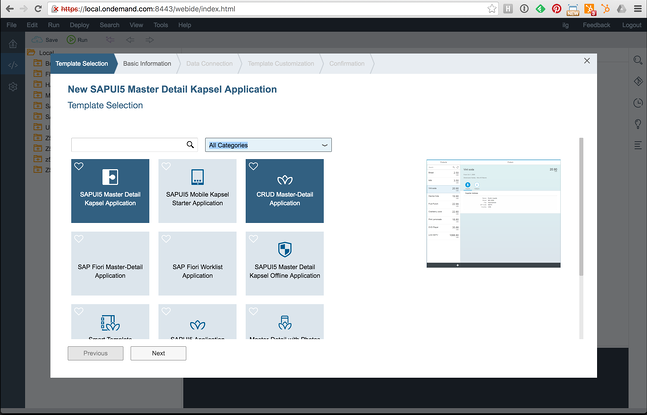
2. Select the CRUD Master-Detail Application template
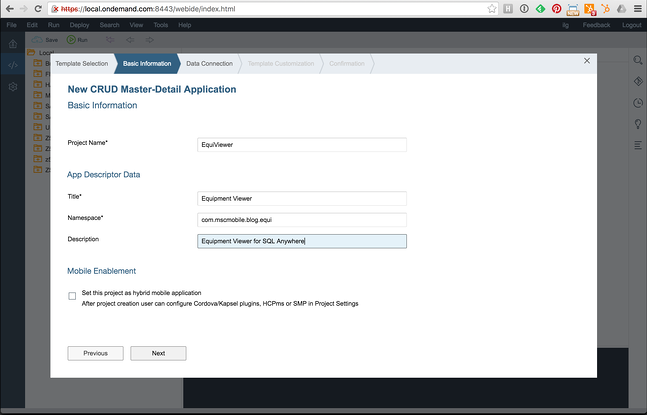
3. Enter the basic project information like name, namespace and title.
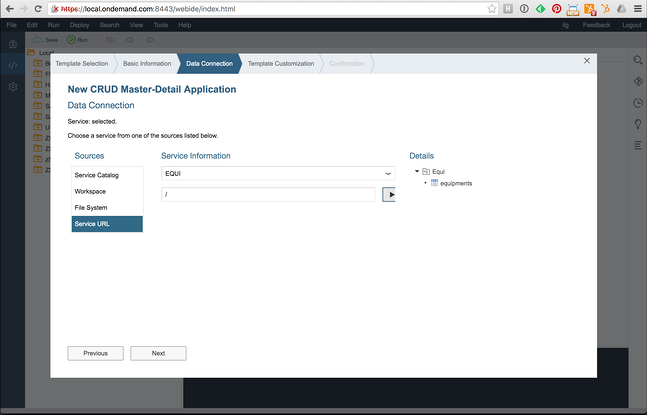
4. Select Servie URL and then your data provider from the dropdown. Enter a / in the input field and press the play button. Now the Equi service should be shown on the right.
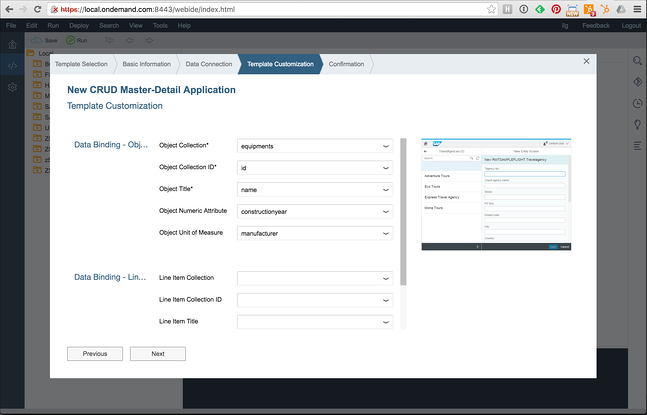
5. Select the collection and the attributes you want to display in the equipment list.
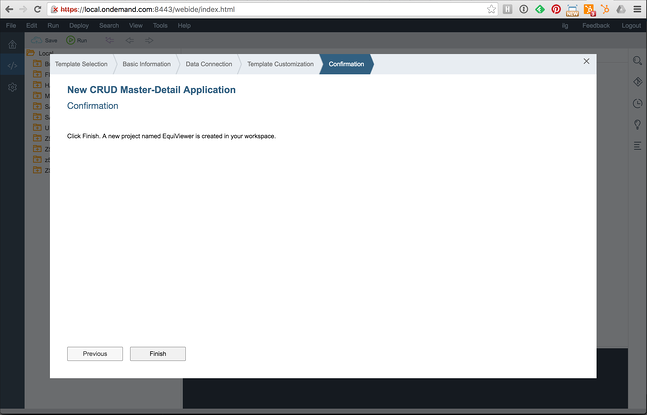
6. Done
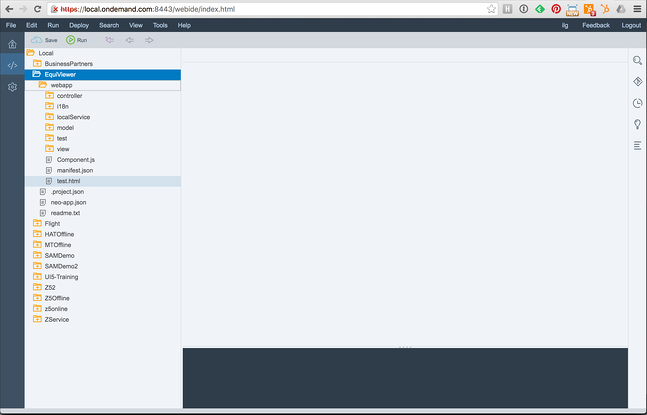
Now the project is created and you can see it in the list of projects on the left side of the Web IDE.
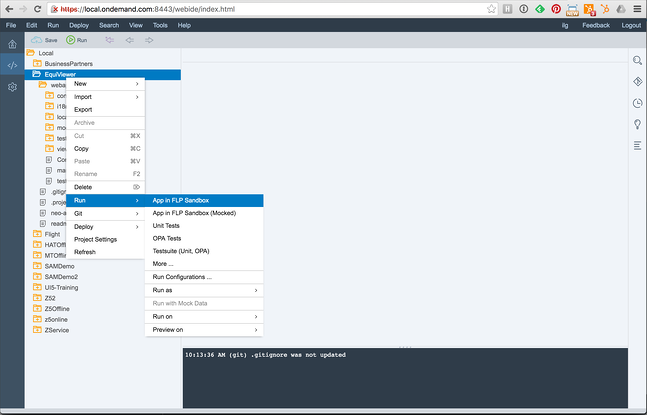
To run the application you have to right click on the project name and select Run - App in FLP Sandbox.
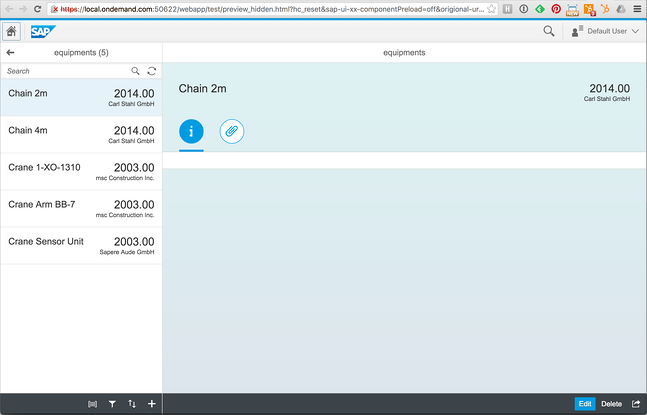
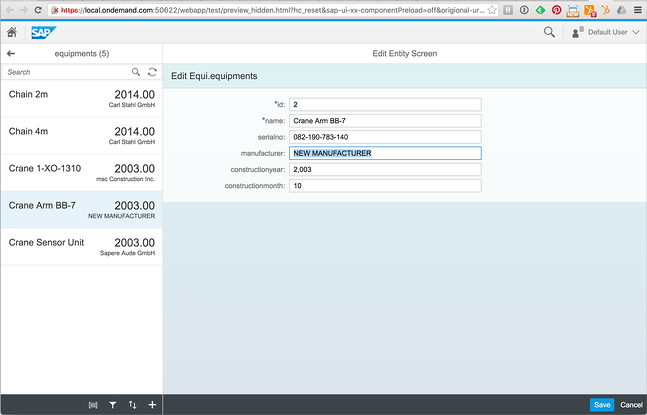
The application is started and opened in a new browser tab. By selecting the Edit button you can get the selected entry into edit mode.
You can now change the data in the SQL Anywhere database from this Fiori-like app.
When we go back into the ISQL and do a select on the table again, you will see that the update was successful.

This was a very simple scenario that did skip important topics like for example security. But it shows how easy a SQL Anywhere database can be used as a OData data source.
In combination with MobiLink, SQL Anywhere can be used as a remote database and can be synchronized with central databases like HANA, MS SQL and others. This can be used for mobile offline scenarios (you find examples here and here) or for Internet of Things (IoT) use cases.
Under the name RDS (Remote Data Sync), MobiLink is part of the HANA database and the HANA Cloud Platform and is promoted by SAP for IoT scenarios. SQL Anywhere as the remote database is used to collect data onsite, next to the equipment and sensors. Data can be filtered there and then be synced with the central consolidated HANA instance for further analyses.
The OData option now allows us to easily create local applications that connect to the SQL Anywhere database to check the local status of equipments and sensors.

